Intro
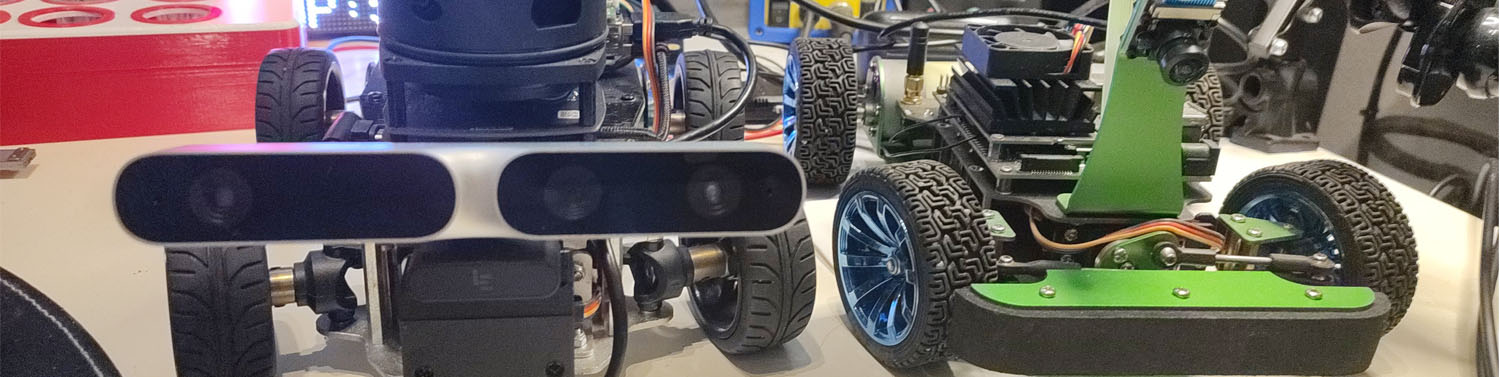
Needed a board that was capable of delivering at least a 720p videostream and went for the NanoPi Duo2. This board has an Allwinner H3 CPU on board which should (theoretically) handle 1080p H264 encoding at 30fps. (in combination with Cedrus encoder) Cedrus is a part of the Allwinner SOC which accelerates H264 encoding but is a bit of a trick to set up. Especially on mainline kernels. This tutorial is about how to setup your NanoPi (or other Allwinner H3 board) to recognize the I2C camera and Cedrus device. Just edit the Device Tree files that applies to your Allwinner compatible board.
Table of Contents
OV5640 sensor
The NanoPi Duo2 does not recognize the OV5640 image sensor and Cedrus H264 hardware encoder by default. For this to work we need to enable them by editing the Device Tree. Download the kernel source and extract.
Kernel source
sudo apt update
sudo apt upgrade

sudo apt install build-essential
uname -r # check your current kernel version
sudo apt install linux-source-<your current kernel version>

In my case:
sudo apt install linux-source-5.8.6-current-sunxi

cd /usr/src
sudo tar xf linux-source-5.8.6-sunxi.tar.xz
Device tree
Now we have an extracted kernel source sitting in /usr/src. Then we need to copy over the boards config to the source directory.
sudo cp /boot/<your-config>.config /usr/src/linux-source-5.8.6-sunxi/arch/arm/configs/nanopi-duo2_defconfigThe Device Tree files are located in the arch/arm/boot/dts directory. In that directory we need to edit three files. The first one is to enable the OV5640 camera sensor.
sudo nano arch/arm/boot/dts/sun8i-h3-nanopi-duo2.dtsIn that file insert this inside the “model” braces
cam_xclk: cam-xclk {
#clock-cells = <0>;
compatible = "fixed-clock";
clock-frequency = <24000000>;
clock-output-names = "cam-xclk";
};
reg_cam_avdd: cam-avdd {
compatible = "regulator-fixed";
regulator-name = "cam-avdd";
regulator-min-microvolt = <2800000>;
regulator-max-microvolt = <2800000>;
vin-supply = <®_vcc3v3>;
};
reg_cam_dovdd: cam-dovdd {
compatible = "regulator-fixed";
regulator-name = "cam-dovdd";
regulator-min-microvolt = <1800000>;
regulator-max-microvolt = <1800000>;
vin-supply = <®_vcc3v3>;
};
reg_cam_dvdd: cam-dvdd {
compatible = "regulator-fixed";
regulator-name = "cam-dvdd";
regulator-min-microvolt = <1500000>;
regulator-max-microvolt = <1500000>;
vin-supply = <®_vcc3v3>;
};And this part at the top level
&csi {
status = "okay";
port {
#address-cells = <1>;
#size-cells = <0>;
/* Parallel bus endpoint */
csi_from_ov5640: endpoint {
remote-endpoint = <&ov5640_to_csi>;
bus-width = <8>;
data-shift = <2>;
hsync-active = <1>; /* Active high */
vsync-active = <0>; /* Active low */
data-active = <1>; /* Active high */
pclk-sample = <1>; /* Rising */
};
};
};
&i2c2 {
status = "okay";
ov5640: camera@3c {
compatible = "ovti,ov5640";
reg = <0x3c>;
clocks = <&cam_xclk>;
clock-names = "xclk";
reset-gpios = <&pio 4 14 GPIO_ACTIVE_LOW>;
powerdown-gpios = <&pio 4 15 GPIO_ACTIVE_HIGH>;
/* power_en-gpios = <&pio 3 14 GPIO_ACTIVE_LOW>; */
AVDD-supply = <®_cam_avdd>;
DOVDD-supply = <®_cam_dovdd>;
DVDD-supply = <®_cam_dvdd>;
port {
ov5640_to_csi: endpoint {
remote-endpoint = <&csi_from_ov5640>;
bus-width = <8>;
data-shift = <2>;
hsync-active = <1>; /* Active high */
vsync-active = <0>; /* Active low */
data-active = <1>; /* Active high */
pclk-sample = <1>; /* Rising */
};
};
};
};
&i2c2_pins {
bias-pull-up;
};
Compile device tree
Now compile the dts file, copy it and reboot
sudo make nanopi-duo2_defconfig
sudo make dtbs
sudo cp arch/arm/boot/dts/sun8i-h3-nanopi-duo2.dtb /boot/dtb/
sudo reboot
If every went according to plan you should have a working OV5640 sensor. To check out if it works correctly type:
dmesg|grep ov5You should have something similar to this.
[ 9.356102] sun6i-csi 1cb0000.camera: creating ov5640 0-003c:0 -> sun6i-csi:0 linkCedrus encoder
Next step would be to enable the Cedrus H264 hardware encoder. This is essential to encode a video stream at a decent frame rate while offloading the CPU. Again we need to edit a few Device Tree files and compile the driver.
Device tree
cd /usr/src
sudo nano arch/arm/boot/dts/sun8i-h3.dtsi
At the section above soc insert this
        reserved-memory {
                #address-cells = <1>;
                #size-cells = <1>;
                ranges;

                cma_pool: cma@43c00000 {
                        compatible = "shared-dma-pool";
                        reusable;
                        reg = <0x57c00000 0x6000000>;
                        linux,cma-default;
                };
        };
Change the syscon section to this
                syscon: system-control@1c00000 {
                        compatible = "allwinner,sun8i-h3-system-control","syscon";
                        reg = <0x01c00000 0x1000>;
                        #address-cells = <1>;
                        #size-cells = <1>;
                        ranges;

                        sram_a2: sram@40000 {
                                compatible = "mmio-sram";
                                reg = <0x00040000 0xc000>;
                                #address-cells = <1>;
                                #size-cells = <1>;
                                ranges = <0 0x00040000 0xc000>;

                                scpi_sram: scp-shmem@bc00 {
                                        compatible = "arm,scp-shmem";
                                        reg = <0xbc00 0x200>;
                                };
                        };

                        sram_c: sram@1d00000 {
                                compatible = "mmio-sram";
                                reg = <0x01d00000 0x80000>;
                                #address-cells = <1>;
                                #size-cells = <1>;
                                ranges = <0 0x01d00000 0x80000>;

                                ve_sram: sram-section@0 {
                                        compatible = "allwinner,sun8i-h3-sram-c1",
                                                     "allwinner,sun4i-a10-sram-c1";
                                        reg = <0x000000 0x80000>;
                                };
                        };
                };
Remove or comment out the video-codec section
		/*video-codec@1c0e000 {
			compatible = "allwinner,sun8i-h3-video-engine";
			reg = <0x01c0e000 0x1000>;
			clocks = <&ccu CLK_BUS_VE>, <&ccu CLK_VE>,
				 <&ccu CLK_DRAM_VE>;
			clock-names = "ahb", "mod", "ram";
			resets = <&ccu RST_BUS_VE>;
			interrupts = <GIC_SPI 58 IRQ_TYPE_LEVEL_HIGH>;
			allwinner,sram = <&ve_sram 1>;
		};*/
Above the crypto section insert this
                ve: video-engine@01c0e000 {
                        compatible = "allwinner,sunxi-cedar-ve";
                        reg = <0x01c0e000 0x1000>,
                                <0x01c00000 0x10>,
                                <0x01c20000 0x800>;
                        memory-region = <&cma_pool>;
                        syscon = <&syscon>;
                        clocks = <&ccu CLK_BUS_VE>, <&ccu CLK_VE>,
                                <&ccu CLK_DRAM_VE>;
                        clock-names = "ahb", "mod", "ram";
                        resets = <&ccu RST_BUS_VE>;
                        interrupts = <GIC_SPI 58 IRQ_TYPE_LEVEL_HIGH>;
                        allwinner,sram = <&ve_sram 1>;
                };
Next edit the final Device Tree file
cd /usr/src
sudo nano arch/arm/boot/dts/sun8i-h3-nanopi.dtsi
And insert this at the very end of the file
&ve {
        status = "okay";
};
Compile device tree
Compile the Device Tree once again and copy
sudo make dtbs
sudo cp arch/arm/boot/dts/sun8i-h3-nanopi-duo2.dtb /boot/dtb/
And reboot
sudo rebootAfter rebooting there should be a /dev/cedar device. Check dmesg if that’s not the case.
Cedrus driver
Now we need to compile the Cedrus driver. You can do this on the NanoPi Duo2 itself (slow) or cross compile on another machine (fast). I went for the second option so you need to have gnueabihf and the correct kernel source installed. (on host machine)
sudo apt install gcc-7-arm-linux-gnueabihf
wget https://mirrors.dotsrc.org/armbian-apt/pool/main/l/linux-5.8.6-sunxi/linux-image-current-sunxi_20.08.2_armhf.deb
sudo dpkg -i linux-image-current-sunxi_20.08.2_armhf.deb
cd /usr/src
sudo mkdir linux-source-5.8.6-sunxi
sudo tar xf linux-source-5.8.6-sunxi.tar.xz -C linux-source-5.8.6-sunxi
Build the kernel and modules
make ARCH=arm CROSS_COMPILE=arm-linux-gnueabihf- sunxi_defconfig
# set CONFIG_LOCALVERSION_AUTO=n in .config
make LOCALVERSION="-sunxi" ARCH=arm CROSS_COMPILE=arm-linux-gnueabihf- zImage modules dtbs
Get the Cedrus module source
cd /usr/src
git clone https://github.com/uboborov/sunxi-cedar-mainline
cd sunxi-cedar-mainline
Compile driver
And compile with a few extra build flags
make ARCH=arm CROSS_COMPILE=arm-linux-gnueabihf- LOCALVERSION="-sunxi" KERNEL_SOURCE=../linux-source-5.8.6-sunxi/ Install driver
Now copy the cedar_ve.ko module over to the /lib/modules/5.8.6-sunxi directory of the NanoPi Duo2 and run (on the NanoPi)
sudo depmodEnable the module at startup
echo cedar_ve | sudo tee -a /etc/modules
sudo reboot
When rebooted the cedar device should be enabled and the module loaded. To check you should see something similar to this
[    7.661866] cedar_ve: loading out-of-tree module taints kernel.
[    7.664733] cedar_ve: module verification failed: signature and/or required key missing - tainting kernel
[    7.666365] sunxi cedar version 0.1
[    7.666771] [cedar]: install start!!!
[    7.667053] cedar_ve: cedar-ve the get irq is 46
[    7.667087] sunxi-cedar 1c0e000.video-engine: assigned reserved memory node cma@43c00000
[    7.667508] [cedar]: Success claim SRAM
[    7.756248] [cedar]: memory allocated at address PA: 57D00000, VA: D7D00000
[    7.756263] [cedar]: install end!!!
FFmpeg & GStreamer
FFmpeg
So far we’ve enabled both the OV5640 sensor and Cedrus H264 modules. Next we need to build a version of FFmpeg which uses the Cedrus encoder to speed up the frame rate. (On the NanoPi Duo2 execute)
libcedrus
sudo apt install libcedrus1-devOr building from source
git clone https://github.com/linux-sunxi/libcedrus
cd libcedrus
make && sudo make install
libvdpau-sunxi
Optional – Used for decoding
sudo apt install libvdpau-devOr building from source
git clone https://github.com/linux-sunxi/libvdpau-sunxi
cd libvdpau-sunxi
make && sudo make install
sudo ldconfig
Install dependencies
sudo apt install v4l-utils libmp3lame-dev libpulse-dev libv4l-devlibx264
wget https://download.videolan.org/pub/videolan/x264/snapshots/x264-snapshot-20180121-2245-stable.tar.bz2
tar xf x264-snapshot-20180121-2245-stable.tar.bz2 && cd x264-snapshot-20180121-2245-stable/
./configure --enable-static --enable-shared
make -j4
sudo make install
sudo ldconfig
Clone the FFmpeg repo
git clone --depth=1 https://github.com/stulluk/FFmpeg-Cedrus.git
git clone https://github.com/uboborov/ffmpeg_h264_H3.git
cp ffmpeg_h264_H3/cedrus264.c FFmpeg-Cedrus/libavcodec/cedrus264.c
cp -R ffmpeg_h264_H3/sunxi FFmpeg-Cedrus/libavcodec/arm
Configure and build FFmpeg
cd FFmpeg-Cedrus
./configure --prefix=/usr --enable-nonfree --enable-gpl --enable-version3 --enable-vdpau --enable-libx264 --enable-libmp3lame --enable-libpulse --enable-libv4l2
make -j4
sudo make install
Testing
To test if FFmpeg is working correctly and is using the Cedrus encoder download this file and run
sudo ffmpeg -s 1280x720 -pix_fmt nv12 -f rawvideo -i video.nv12 -pix_fmt nv12 -c:v cedrus264 stream.h264If that went ok then we can move on to the next step, which is using the OV5640 sensor as an input source. But first we need to set the resolution, frame rate and pixel format for the OV5640
media-ctl --device /dev/media0 --set-v4l2 '"ov5640 0-003c":0[fmt:UYVY8_2X8/1280x720@1/30]'To save a stream from the OV5650 sensor run
sudo ffmpeg -f v4l2 -video_size 1280x720 -i /dev/video0 -c:v cedrus264 -pix_fmt nv12 test1.mp4To push a stream from the OV5640 sensor to Youtube you can use
sudo ffmpeg -f v4l2 -video_size 1280x720 -i /dev/video0 -f lavfi -i anullsrc -c:v cedrus264 -pix_fmt nv12 -b:v 2500k -c:a libmp3lame -f flv rtmp://a.rtmp.youtube.com/live2/<your-youtube-key>GStreamer
Alternatively you could also use Cedrus with Gstreamer. I’ve contacted the developer of gst-plugin-cedar to request an update to work with Gstreamer 1.14. Which can be downloaded here.
sudo apt install libgstreamer1.0-0 gstreamer1.0-plugins-base gstreamer1.0-plugins-good gstreamer1.0-plugins-bad gstreamer1.0-plugins-ugly gstreamer1.0-libav gstreamer1.0-doc gstreamer1.0-tools gstreamer1.0-x gstreamer1.0-alsa gstreamer1.0-gl gstreamer1.0-gtk3 gstreamer1.0-qt5 gstreamer1.0-pulseaudio  libgstreamer1.0-dev libgstreamer-plugins-base1.0-dev

git clone https://github.com/gtalusan/gst-plugin-cedar.git
cd gst-plugin-cedar
./autogen.sh
make
sudo make install
To push the OV5640 stream to Youtube
sudo gst-launch-1.0 -ve v4l2src device=/dev/video0 ! video/x-raw,format=UYVY,width=1280,height=720,framerate=15/1,bitrate=2500k ! videoconvert ! cedar_h264enc ! h264parse ! mux. audiotestsrc wave=silence freq=200 ! voaacenc ! aacparse ! queue ! mux. flvmux streamable=true name=mux ! rtmpsink location="rtmp://a.rtmp.youtube.com/live2/<your-youtube-key>"Conlcusion
When streaming over wifi the frame rate is awful, it never exceeds 7fps. But when writing to emmc/sd or consuming the feed with OpenCV (for example) it hits 20 to 25fps.
PayPal
If you like my work, please consider donating


Beste Wim,
Bezig met het laten werken van de OV5640 op een BananaPi M2 zero bordje. Wat een nachtmerrie.
Ik hoop met jouw uitstekende uitleg eruit te komen.
Alleen loop ik bij de eerste instructie al vast
$ sudo apt-get install linux-source-5.10.43-sunxi
E: Unable to locate package linux-source-5.10.43-sunxi
Waarschijnlijk mis ik een add-apt-reposiory.
Bij voorbaat dank
Dan is die kernel source waarschijnlijk niet beschikbaar in jouw repository idd.
Check even met:
apt search linux-source-$(uname -r)
of
apt search linux-source
welke wel beschikbaar zijn.
apt search linux-source | grep sunxi
geeft wel een redelijk aantal kernels maar juist de 5.10.43-sunxi niet.
Sowieso geen sunxi, wel een linux-source-5.10.16-current-sunxi
Het gaat me niet specifiek om een bepaalde versie, zolang ik maar een ARMdebian kernel met een OV5640 kan laten draaien op mijn BananaPi M2 zero ben ik gelukkig
Dan zou ik linux-source-5.10.16-current-sunxi als source gebruiken, zou geen verschil moeten uitmaken met linux-source-5.10.43-sunxi
Welke kernel draai je nu ?
uname -a
En welke OS gebruik je ?
Armbian ?
Nu draai ik
Linux bananapim2zero 5.10.43-sunxi #21.05.6 …. armv7l GNU/Linux
Armdebian.
Wist je trouwens dat van alle OS die ik op de BananaPi Zero, Armdebian het enigste OS is dat de temperatuur op 42° houdt tijdens idle. Alle andere OS schieten meteen naar de 68° of nog hoger.
Misschien iets te maken met een lagere ingestelde standaard kloksnelheid van Armbian. Zag zoiets eens staan in armbian-config.
Btw, mocht je alleen de OV5640 sensor werkend willen krijgen (en niet de cedrus encoder + software) zou het niet al te lastig moeten zijn. Laat maar weten of het lukt.
Het wil niet best lukken. Graag nog wat assistentie. Hoe doe we dat? Blijf ik gebruik maken van je website, of gaan we per e-mail verder? (Als je dat wilt natuurlijk)
Hello,
what is the difference between mainline linux-sunxi and regular mainline linux? I can’t run mainline sunxi-linux with buildroot rootfs. I crooss compiled this version linux on desktop
My guess is that sunxi-linux has all the sunxi specific device trees (dts) and board configuration (defconfig) built into it. What specific problem did you encounter ?
I’m using buildroot 2021.05.1. It generate sdcard.img and I flashed sd card, and after this I replaced zImage and .dtb file with custom linux-sunxi by copying first partition.
When booting I get this:
[ 3.850017] Run /sbin/init as init process
FATAL: kernel to[ 3.861480] Kernel panic – not syncing: Attempted to kill init! exitcode=0x00007f00
o old
[ 3.870491] CPU: 3 PID: 1 Comm: init Not tainted 5.10.16+ #242
But it boots successfully when using zImage provided by buildroot
Ok, so that i understand correctly. You’re using the Armbian buildroot (./compile) to build the sdcard and kernel. But when you download and compile the kernel tree outside the Armbian buildroot and try to boot it up you see that error ? (kernel panic) Correct ?
1. I’m using pure buildroot(not armbian) https://buildroot.org.
2. Yes, I didn’t noticed earlier, that it is written in log that “Kernel is too old”. I will try lower buildroot version and think this will help
sorry for duplicate
No problem, try that. Otherwise try the ‘old fashioned’ way by using gnueabihf.
Btw, if you built the same kernel tree that you currently have running on Armbian there is no need to copy over the zImage. Only the Device Tree needs to be compiled to get the camera and cedar devices recognized. The OV5640 driver is included in newer Armbian kernels.
1. I’m using pure buildroot(not armbian) https://buildroot.org.
2. Yes, I didn’t noticed earlier, that it is written in log that “Kernel is too old”. I will try lower buildroot version and think this will help
1. I’m using pure buildroot(not armbian) https://buildroot.org.
2. Yes.
I didn’t noticed earlier, that it is written in log that “Kernel is too old”. I will try lower buildroot version and think this will help
I have get /dev/cedar_dev and cedar_h264enc,but ov5640 gstreamer set 1280*720,
get dmesg “sun6i-csi 1cb0000.camera: Wrong width or height 1280×720 (640×480 expected)”
only VGA can be execute, what’s the driver problem? and how to change ouput h264 bitrate?
thankyou.
Has been a while ago since I’ve touched this subject, but the first thing that comes to mind is have you set the proper dimensions using media-ctl ?
media-ctl --device /dev/media0 --set-v4l2 '"ov5640 0-003c":0[fmt:UYVY8_2X8/1280x720@1/30]'Thankyou for your job , another question: Default ouput stream need 10Mbps bandwith, so I look in cedar_ve module and gst-plugin-cedar source, if like gstplugin ‘x264enc bitrate=1024’,that i can control the stream bandwidth and video profile, or the kernel module cedar-ve regvalue can be chang stream bandwith? video/x-raw,biterate=2500k just give the info, didn’t change output bitrate.
If i understand your question correctly, you want to increase the bandwidth to 10Mbps using Gstreamer. Correct ?
I want adjust from 10Mbps to 2Mbps.
So setting bitrate=2500k in Gstreamer does not output a 2.5Mbps stream ? it stays at 10Mbps. Than i’m at a loss, could be something to do (like you said) the gst-plugin-cedar. Would advise you to contact the developer of the plugin or otherwise ask in Gstreamer related forums.
Hi! Following this guide on 5.15.93-sunxi, but wasn’t successful.
“After rebooting there should be a /dev/cedar device. Check dmesg if that’s not the case.”
There is no /dev/cedar appearing after rebooting. What exactly am I looking for using dmesg? Can’t find anything related to cedar. Not sure if it’s worth continuing with the next steps if this step fails already.
Would love to get this working. After all, this guide is still be best all-in-one-place source I could find to get a performant hw-accelerated camera stream.
Lot’s of things could have gone wrong i’m afraid. Could you tell me what board you are using and which Armbian and kernel version ?
Thanks for your reply, Wim!
I’m currently on Armbian 20.08.1 with Buster, and I’ve previously tried 21.02 (Bullseye) with the same issue. Current Armbians (23.02 with the 6.x kernel) don’t even boot on the NanoPi Duo2.
It’s practically untouched apart from following this guide.
If you care to take a look, I’ve uploaded the dmesg output at pastebin.com/vWgk0te5
Took a look at the dmesg, no mention of cedar device being created. So the problem lies in the device tree. Could you share your sun8i-h3.dtsi
Absolutely! For the sake of completeness, I also uploaded the other two files that have been modified acording to the guide:
pastebin.com/0nRi9rHm sun8i-h3.dtsi
/mLQ8cA5S sun8i-h3-nanopi.dtsi
/LyrCvXrS sun8i-h3-nanopi-duo2.dts
(Apparently, the blog software doesn’t like to see me posting several URL-like strings, as it keeps removing my replies?!)
You’ve edited all the device tree files correctly. Compiled the files and copied them in place ? The next thing i would look at is the u-boot log (connecting the NanoPi to an UART adapter) to see if the dtb files are actually applied.
Thanks again, Wim.
I verified that the compiled sun8i-h3-nanopi-duo2.dtb in /usr/src/.. is identical to the file I copied to /boot/dtb/ and it is. (And yes, the files are edited in place and compiled as per your instructions.)
I added an echo in /boot/boot.cmd (and regenerated the boot.scr with mkimage) to print out the fdtfile variable to the serial console to verify that it actually loads sun8i-h3-nanopi-duo2.dtb on boot, and it does.
But I noticed that there is an error that corresponds to the reserved-memory entry that has been added to sun8i-h3.dtsi in this guide:
ERROR: reserving fdt memory region failed (addr=57c00000 size=6000000)
As a result of this, I guess, the video-engine can’t load properly, as it is referencing this memory region.
If I undo the changes made to sun8i-h3.dtsi and sun8i-h3-nanopi.dtsi and recompile, the error disappears.
Full U-Boot log: pastebin.com/NAtmDJwT
It looks like they’ve remapped the memory allocation somewhat and therefor the fixed memory claimed by the cedrus encoder doesn’t get assigned properly. Should be fixable, but i’m a bit strapped for time to dive into this. Besides, there are much better encoders on the market (like the Rockchip RK3588S) nowadays
Oh, no worries! You did more than I could have asked for.
Thanks to your help, I now have some clues what to look for.
I’ll keep digging at it and if I can get it to work, I may report back with all the required changes that needed to be made, for future reference.
Usage ffmpeg with motioneye on Allwinner H3 board ( 6.1.63-current-sunxi kernel )
https://4pda-to.translate.goog/forum/index.php?showtopic=750921&st=10260&_x_tr_sl=ru&_x_tr_tl=en&_x_tr_pto=wapp#entry128032933
https://github.com/gtalusan/gst-plugin-cedar.git how do you use the plugin? you don’t have ION.
Sorry, what is ION ?
https://github.com/gtalusan/gst-plugin-cedar/blob/master/src/ion.h https://snapcraft.io/docs/ion-memory-interface
Thank you, it worked for me.
Cedar didn’t appear in /dev/ (like Kaiser metioned) until I compiled cedar_ve.ko.
I also get strange error (DRM_IOCTL_MODE_CREATE_DUMB failed: Cannot allocate memory) when running kivy on mali gpu.
I use banana pi m2 zero with 512MB ram.
And I also have to add path to gstreamer plugin at the end of command
I was able to fix DRM_IOCTL_MODE_CREATE_DUMB failed: Cannot allocate memory error by reducing const for allocating memory size in cedrus driver source